Photo Scanning Services

Epson-V850 pro flatbed scanner

PHOTO SCANNING SERVICES

Scan slides, photo negatives and photographs

Discover our Expert Scanning Services and Preserve your Legacy in Stunning Detail!

Begin your restoration journey on the right foot with our superior scanning services. At Yesterday’s Photo, we understand that a high-quality scan lays the foundation for impeccable restoration. Our expert team employs cutting-edge scanning techniques to capture every detail, ensuring a pristine starting point for your cherished memories. Whether it’s old photographs, vintage film, or precious documents, our meticulous scanning process ensures optimal clarity and precision. Trust us to elevate your restoration experience and bring new life to your treasured memories:

Slide digitising of a selection of plastic framed slides

SLIDES SCANNING

Learn More​

Bulk PHoto
Scanning

Learn More​

Damaged photo from the portraitist François Cornand from the early 1900s, Photo courtesy of Isobel Fletcher Western Australia

Transforming Photographs into Family Heirlooms

People appreciate old printed or darkroom-developed images, and you’ve probably attempted to keep them in excellent shape. However, as time passes, they grow more fragile and vulnerable to deterioration.

Capturing important life events with a camera is comparable to investing in family heirlooms; the worth of wedding photographs, for example, gradually grows with the passage of time.

Most older photographs are remarkable and one-of-a-kind, so they are more than simply precious items; they are a legacy to pass on to future generations and a great tool for tracing our ancestors.

A damaged image may be heartbreaking, and the bad news is that degradation will inevitably occur over time due to contact to the environment, touch, dampness, water, dust, and ironically what created it: light! 

We can help to safeguard the survival of your antique images for future generations by digitising them utilising the most recent trends, enhancement, and scanning procedures.

Home picture scanning is easy and produces effective results


Scanning is a practical and yet traditional method of digitalising your photos and importing them into editing software such as Adobe Photoshop. 

Compared to other methods of digitalisation, scanning provides a significant advantage in that it provides a controlled environment in which you can achieve uniform results and even use a surface to flatten undesirable curling in your original photos.

However, there are certain things to consider when digitising your images at home, whether using a scanner or your photography abilities. The following link has a series of guidelines for scanning historic family photos for restoration purposes.

However if you want to do this professionally at yesterdays we are always ready to help! 

Negative film digitising using a tray

1. Carefully Remove dust beforehand

Your images have accumulated dust, grime, oil, or other foreign material such as hair or lint over the years, particles that will remain there and become more evident if photo enlarging

Depending on the quality of the photograph, you may remove these particles using a soft brush; however, we suggest wearing gloves to avoid leaving fingerprints on the surface. Try to accomplish this in a sterile setting and avoid removing images that have been stuck to glass or other photos, any damage now will complicate the photo restoration process.

holes dust and scratches on a child portrait

2. Avoid glue or sticky tape when ripped

If the picture has been broken into parts, you should attempt to arrange them such that they are near to one another on the scanner’s glass, but not overlapping and do not use glue or sticky tape.

Torn photo in lower corner

3. Photographing images is an alternative to scanning.

DSLR cameras and smartphones can capture and duplicate most older photos, physical or digital.

Your phone camera or digital camera may create an acceptable input for Photoshop, but depending on the photo’s purpose and your mastery of the software, professional scanning services or gadgets are preferable.

A photo of a photo is particularly convenient when trying to digitalise a large-sized photography.

Using our phone’s camera, we may snap a duplicate of a printed or framed picture while visiting a relative. This is great when granny won’t let go of the family album and sometimes sufficient for us to restore a photo.

Old photography restoration and preservation in a family album, vintage reflex camera with polarised filters and a negative film

4. Editing is the next step

Even if the quality won’t be outstanding, you may acquire a derivative of a beloved picture using your phone and we can use this photo as a baseline to restore the photo further

Photo restoration services

Tips and tricks to consider when photographing an old photo

1. If available Turn on the camera grid

Even though you can easily remedy this in Photoshop using a perspective cropping tool, it’s ideal to line up your phone as flat as possible over the picture to ensure that the corners and edges are squared up, your camera grid is an excellent guide, make sure you use it.

2. Avoid shadows and reflections

A good piece of advice is to try to take the photo in the shade outside, cloudy days are the best, just try to avoid your own shadow or your phone’s shadow when capturing the image. 

A good piece of advice is to try to take the photo in the shade outside, cloudy days are the best, just try to avoid your own shadow or your phone’s shadow when capturing the image. 

There are fantastic and affordable alternatives available on the market to help you achieve this effect using indirect light or a softbox.

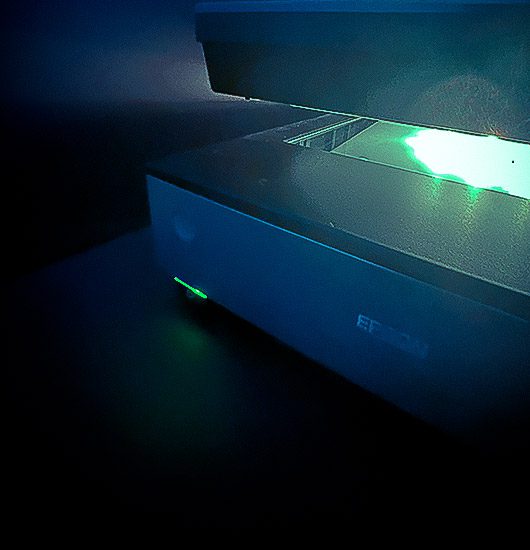
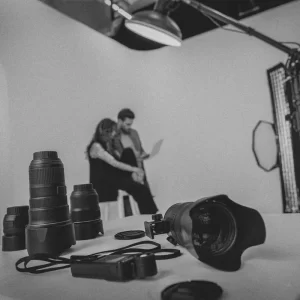
3. DSLR’s are great to capture a photo of a photo

A high-quality camera, particularly a full-frame model, is ideal for reproducing the details of an antique photograph while protecting the original. Just make sure you’re focusing correctly and staying inside your lenses’ focal range by using a tripod and an appropriate aperture setting.

However, it is crucial to shoot in RAW if you want to extract as much data as possible from the original image; RAW files have a wider dynamic range, more information, and a better resolution than their JPEG counterparts.

4. When using a wide-angle lens, the image might get distorted.

You should use a macro lens and attempt to maintain the frame straight while taking a picture of a picture, since lens distortion will cause undesired deformation owing to the sensation of curvature.

WE CAN SCAN YOUR PHOTOS

Our Postman will
Deliver !

Write us if you have a question or if you want a personalised service or an estimate.

Our team is always ready to help! 

No stamps required!

Photo Negative Scanning

Negative film in a black background

PHOTO NEGATIVE SCANNING

Digitise your negatives & transparencies

PHOTO & FILM NEGATIVE SCANNING

High quality photo negative scanning service

Negative film strip

Have you ever stumbled upon old negatives hidden away in a shoebox, longing to unlock the stories they hold? With our expertise, those cherished memories can be transformed into timeless digital treasures. Step into the world of nostalgia and relive memories with our cutting-edge film and transparencies digitisation services

THE BENEFIT OF SCANNING PHOTO NEGATIVES

The biggest benefit of photo negative or negative film scanning is that there is not paper texture to edit, when scanning an old photo it is likely that you encounter different textures such as honeycomb or rugged surfaces.

During several periods in history textured papers were quite popular, however today restorers can suffer the consequences of this past trend specially with the “satin photo paper”.

When a textured photo is scanned, a series of repetitive light and shadow patterns are inherited, these can be reduced by the scanner native algorithm or by simply blending four scans of the same photo with a 90 degree rotation and blending together, however paper texture removal from a photo is always a big challenge.

Therefore texture might require to be digitally removed, softened or replicated, a process that is usually challenging, time consuming, and possibly destructive to the image. 

Good news are: When scanning negatives and slides paper texture isn’t a problem anymore.

Advanced techniques, algorithms for image processing and photoshop plugins are available to supress periodic patterns, remove or minimise the paper texture of an old photo, by separating frequencies with methods such as FFT (fast fourier transform) however the deterioration of an old photo could complicate the process as it will confuse the algorithm in some instances. 

Visit our photography scanning tips page to know more about image digitising or check our transparencies scanner recommendation if you want to digitise these at home


Old photo paper texture pattern
Repetitive patterns from textured photographic paper can be avoided when scanning photo negatives

COMMON PHOTO NEGATIVES ISSUES

Photo Negatives are made out of a transparent material, such as plastic or glass, therefore scratches are quite often the issue to address followed by mould and temperature deformation.  

Photo negatives provide lot of flexibility when digitalising your photos, this means that it is preferable to work from negatives rather than the actual photo.

Bad news are, photo negatives are often more likely to suffer physical damage if not preserved in a good environment, meaning that sometimes the original photos could be a much better input source.

So it is worthy to have a good look around before commencing the restoration process and decide which source provides the best input for the photo restorer and for the project itself.

In some instances, scanning both prints and negatives together to build up photo-hybrids can help to achieving good results, as both might provide information the other source is missing.

Detail of a photo negative with scratches on its surface
Cleaning negative film might result in scratches, thus it's crucial to minimise friction between dust particles and the transparencies surface.

How to Scan Photo Negatives?

Scanning negatives the right way

1. Prepare your negatives for scanning: 

Before a digital photo restoration can be performed, the original photo negative needs to be scanned properly. This is a crucial step and critical to achieve good results, since it ultimately determines the quality of your restored photo.

Regardless, you will need to either send the negatives off for professional drum scanning, or have a film negative capable scanner. And remember at Yesterday’s photo we can help!

However, please be careful not to damage the surface of your negatives as this could deteriorate the film. Instead, be gentle and start by cleaning with a compressed air duster prior to employing any other cleaning method. (However, keep in mind that some users face condensation issues with air dusters.) To cut a long tale short, by using this technique, your scans with reduce the need for digital dust and scratch removal.

Negative film shows signs of deterioration due to scratches and dust
Photo restoration loupe magnifier, item to perform an old photo damage assessment

3. Know your Dpi’s

The greater the amount of Dots per inch (dpi), the more the detail your scanner will be able to capture, the only downside to this rule is the size of the output file, as more pixels per inch mean more Megabytes of information, specially when dealing with uncompressed formats as TIFF. 

A standard of 300 dpi is recommended when printing most photographs, however when we are talking about old photo restoration and specially when enlarging a photograph a higher density of pixels its absolutely necessary, have in mind that there is a limit on how much information is carried out by a negative, slide or print, specially when deteriorated by external factors

Epson-V850 pro flatbed scanner

4. But how to get a good quality scan using your home scanner?

Some home scanners will provided you with amazing features and can do a fair job, 

We usually recommend scanning at 600 to 1600 dpi at least and in colour (regardless if the source photo is in black and white) but it all depends of the purpose of the scan and your tech resources,

To identify the required resolution and what is appropriate for your project, you need to determine output physical size, desirable file size range, proximity to the viewer, printing material, or display resolution. (HD, Full HD, 4k) 

Have in mind that prints always require a higher resolution than a display and that reducing the resolution and size of a photo is much easier than increasing it.

You could be tempted to utilise low-resolution/fast settings while just scanning for social media. Despite the fact that this is practical if you want a photo right away, it is detrimental if you wish to preserve a family genealogy item. Instead, keep in mind that your scan today might be the heirloom of tomorrow.

STILL NEED HELP CONTACT US TODAY TO CHEK ON OUR SCANNING SERVICES

WE SCAN YOUR PHOTO NEgatIVES

Our Postman will
Deliver !

Write us if you have a question or if you want a personalised service or an estimate.

Our team is always ready to help! 

No stamps required!