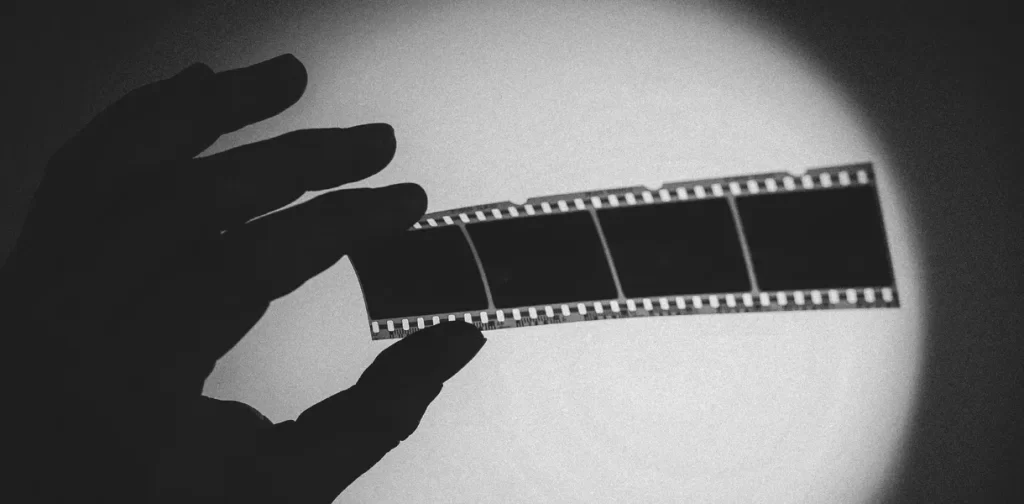
Preparation is the key to preserve Your Memories for a Lifetime

1. Consider choosing a "good" scanner
Choosing a good scanner is important because it can greatly affect the quality of the final scanned image. A good scanner will accurately capture all of the detail and color information in the original image, while a poor scanner may produce a scanned image that is washed out, blurry, or has inaccurate colours, be mindful that plenty of multipurpose printers fall into this category and may be lower-quality than a standalone scanner.
Multifunctional printers can print, copy, and scan rather than just scanning. Thus, the scanner in a multipurpose printer may have lower resolution, bit depth, and dynamic range than a standalone picture scanner. Multifunctional printer software may not be as feature-rich or user-friendly as scanning software.
For professional-quality picture scans, consider a standalone photo scanner. If you scan images periodically or for personal use, a versatile printer with a scanner may suffice.
If you want to take is a step further you can also contact a professional scanning service
Check on the links below my flatbed scanner recommendations:
2. Carefully clean the picture:
Scanning a photo or digitising a transparency benefits substantially from a professional cleaning as it ensures a crisp, detailed image. However there is risk of damaging the photo so be a mindful and extremely careful.
Before scanning and old photo, carefully clean a photo or transparency:
Preferably with an air duster, or with a soft, dry brush, dust the image or transparency. This removes surface dust and grime.
A gentle, wet cloth may gently clean a stained or filthy image or transparency but be mindful that many cleaning solutions and chemicals might harm the image surface.
If the picture is especially dusty or discoloured, use a microfiber cloth dampened with distilled water. Use mild pressure and wring out the fabric to make it moist, not wet.
Air dry or lightly blot the picture with a clean, dry towel. Paper towels and tissues may leave fibres or lint on the picture.
A competent conservator can safely clean and manage fragile or damaged pictures and transparency before scanning an old photo, however it is best practice to have a first scan before cleaning for safe keeping.
Some picture damage can’t be fixed, and cleaning it may create further harm. Before cleaning, visit a conservator or someone who has knowledge with ancient photos.
This will prepare the image for post-processing where further enhancements such as dust and scratches removal or suppression can take your image to a better condition


3. Clean and prepare the scanner or flatbed glass
Cleaning and prepping the scanner or flatbed glass ensures high-quality scanned pictures. Tips for cleaning and prepping the scanner or flatbed glass:
Before each usage, clean the scanner or flatbed glass with a lint-free cloth or microfiber duster. Remove dust and dirt from the surface.
Use a light cleaner like isopropyl alcohol or a scanner-specific cleaner to remove smudges and stains from the scanner or flatbed glass. Apply a little solution to a clean, lint-free cloth or microfiber duster and gently wipe the scanner or flatbed glass a similar treatment is applicable before scanning photo negatives.
Paper towels and ammonia-based cleaning solutions might harm the scanner or flatbed glass.
Clean your scanner’s document feeder. Remove any feeder debris.
Using a clean, lint-free cloth or microfiber duster, dry the scanner or flatbed glass.
Make sure the scanner or flatbed glass is dry and smudge-free before scanning.
Clean and dust-free film or negatives are essential for scanning.
Choosing the right settings
4. Say "yes" to Colour depth
Bit depth, which is sometimes called “colour depth,” is the number of colours that can be seen when a picture or image is scanned. The picture is more detailed and accurate when it has a higher bit depth because it captures more information.
48-bit colour depth scanning is better than 24-bit scanning in many ways:
With 48-bit scanning, more colours are picked up than with 24-bit scanning, so the colour scan is more accurate.
More detail: 48-bit scanning captures more information in the highlights and shadows than 24-bit scanning, making a more complex picture.
Since 48-bit images have more colour information, they are easier to change and modify after they have been taken.
Larger colour space: With 48-bit scanning, you can capture more colours than with 24-bit scanning, so the picture you get is more colourful.
Larger dynamic range: 48-bit scanning records a larger dynamic range than 24-bit scanning, so the final scanned picture will have more tonal values.
There are a few benefits to 48-bit scanning, but it needs more space and processing power than 24-bit scanning. Most monitors and printers can’t show or print 48-bit pictures, so you’ll need to convert them before you share or print them.
Scanning at 48-bits (48-bit colour depth) is better than 24-bit scanning in a number of ways. The colour accuracy, detail, post-processing options, colour space, and dynamic range are all better with 48-bit scanning. It takes more memory and processing power, and most screens and printers can’t show or print 48-bit pictures.

5. Choose the right resolution
It’s important to consider the resolution when scanning your photos. A resolution of 300 dpi (dots per inch) is considered the minimum for good quality scans. This ensures that the images will be clear and sharp however we recommend at least 600 dpi to future proof your image and open the possibility of enlarging your photo.
A higher-resolution scan produces a bigger, more detailed picture. The scanned picture will have more pixels and may be expanded without losing quality. This is important if you want to print the scanned picture bigger.
Second, a higher-resolution scan preserves more picture detail. Low-resolution scanning may lose certain picture features. Scanning at 600 dpi or higher preserves these details.
High-resolution scanning gives post-processing flexibility. High-resolution scans give you additional pixels to modify picture brightness, contrast, and colour balance.
For older or damaged images, scanning at a high resolution helps decrease image noise and grain.
Scanning at a higher resolution can result in bigger file sizes, which may demand more storage space and computing resources to edit on your computer.
Scan at least 600 dpi to maintain more of the photo’s original detail, get a bigger and more detailed picture, and have more post-processing freedom. It’s fantastic for high-quality images you wish to print bigger or alter more.
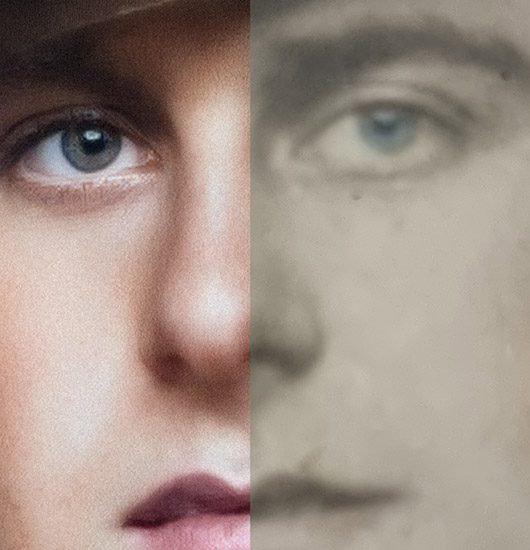
6. Always scan in colour
Next, think about the color depth. If your photos are in color, make sure to scan them in color. If they are black and white, scan them in colour as well. YES in colour!
When scanning in colour, set your scanner to 48-bit color. This will ensure that the colors are rich and vibrant.
Scanning a black and white photo using color settings may seem counterintuitive, but it can actually have a number of benefits.
The main benefit is that it can help to preserve more of the original detail in the photo. When a black and white photo is scanned in grayscale, it is reduced to 256 shades of gray. However, when scanned in color, it can capture up to 16.7 million shades, providing a much broader range of tones and textures. This can help to preserve the detail and texture in the photograph, making it appear more like the original.
Another benefit of scanning a black and white photo using color settings is that it allows for more flexibility in post-processing. With a color scan, you have the ability to adjust the colors and tones in the photo using image editing software. This can help to improve the overall look and feel of the photo, and can even be used to create unique effects.
It’s important to note that scanning a black and white photo using color settings may result in a larger file size, and it may take more processing power to edit them on your computer.
In summary, scanning a black and white photo using color settings can help to preserve more of the original detail and give you more flexibility in post-processing. It is not always necessary but it could be a good option if you want to have more control over the final result.

7. The .tiff or .jpeg Dilemma solved
Scannable picture formats include JPEG and TIFF. Both have pros and cons:
JPEG (Joint Photographic Experts Group) is a popular file format that is compact and compatible with most picture editing and viewing tools. Most websites and social networking platforms accept it, making picture sharing and uploading simple.
JPEG files are smaller, making them simple to distribute and upload. Lossy compression reduces JPEG file sizes by removing picture data. This is great for sharing images online or on social media, but it reduces picture quality.
TIFF (Tagged Picture File Format) is a lossless file format that saves all image data. This improves picture quality but increases file size. Most image editing and viewing software supports TIFFs, although certain websites and social media platforms may not.
TIFF is high-quality. Lossless TIFFs preserve all picture data. This improves picture quality but increases file size. Most image editing and viewing software supports TIFFs, although certain websites and social media platforms may not.
JPEG is extensively used because of its tiny file size and compatibility with most picture editing and viewing tools. TIFF, a lossless file format, produces higher-quality photos but is bigger, making it excellent for sharing or uploading. It preserves picture quality and edits, however certain websites and social media platforms don’t support it.
I would always choose .tiff but if you are looking for a fast and low size solution .jpg can do the job.
Archiving and printing
8. Once finished Keep a backup in the cloud
There re amazing paid and free options to keep your files secure and at hand some of them are:
Google Photos: Google Photos offers unlimited storage for photos and videos up to a certain resolution. It also includes automatic photo organization, editing tools and easy sharing options.
Amazon Photos: With Amazon Photos, users get unlimited photo storage as well as 5GB for videos and other files. It also offers easy photo organization and sharing.
iCloud: iCloud offers 5GB of free storage for photos, videos, and other files. It also includes automatic photo organization and easy sharing options.
Dropbox: Dropbox offers 2GB of free storage for photos, videos, and other files, with the option to upgrade to a paid plan for more storage. It also includes easy sharing options.
Flickr: Flickr offers 1 TB of free storage for photos and videos, with easy sharing options and a large community of users to connect with.
It’s important to note that free storage plans may have some limitations, like resolution or file size, and may also have ads, or force you to upgrade to a paid plan.


9. Don't underestimate the Timeless Charm of Printed Photographs
Digital pictures lack the charm of printed photos. Holding a print in your hand, seeing the nuances and textures, and appreciating the skill that went into capturing the event is amazing.
Printed photos are ageless. They’re cross-platform and may be enjoyed for decades. They may be handed down as heirlooms and do not need technology to examine.
Frames, albums, and scrapbooks may showcase printed photos. They may be displayed on walls, mantles, or in memento boxes. Digital photographs cannot be personalised like this.
Finally, physical photos stimulate emotions and memories more than digital ones. Holding a print might bring back the photo’s feelings and memories.
A printed picture is a lasting, physical, and emotional memento.
Follow this link for more photograph scanning tips