Professional old photo scanning & digitising services
We hold the utmost respect for each photo entrusted to us
At Yesterday’s Photo ®, we understand the significance of your cherished memories and the value they hold. With utmost care and respect, we offer a range of exceptional services to transform your original photos into digitised treasures. From preserving your family heirlooms to ensuring the longevity of important documents, our team is dedicated to delivering superior quality and meticulous attention to detail. Join us as we embark on a journey to preserve your past, today and for generations to come.
Uniting Passion for Photography with Advanced Scanning Technology
At Yesterdays Photo®, our love for photography runs deep, and we wholeheartedly embrace this art form in our advanced scanning techniques. We believe that preserving your cherished memories goes beyond mere technicalities. It requires a genuine appreciation for the artistry and emotions captured within each photograph but most of all empathy for your history.
Re-capturing Old Moments with Care and High-End Scanning Gear
When it comes to scanning and digitising your photos, we merge our passion for photography with cutting-edge techniques and gear. Our team understands the intricate nuances of composition, lighting, and storytelling that make a photograph truly special. By combining our expertise in scanning technology with our artistic sensibilities, we ensure that your memories are not only preserved but also enhanced in their digital form.
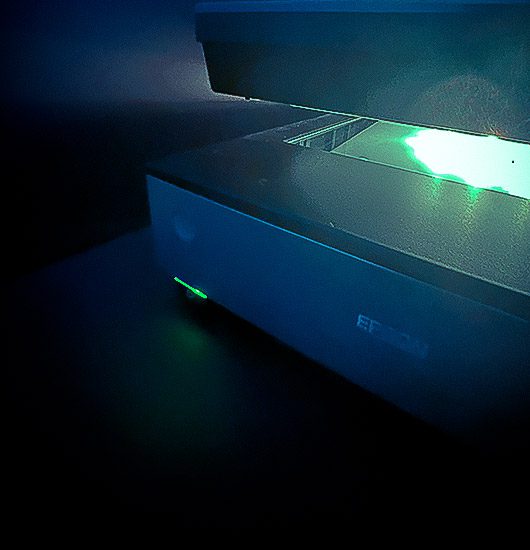
Several aspects, like as using the right tools, taking careful precautions beforehand, and employing efficient scanning procedures, contribute to ensuring the highest quality in the photo restoration process.
Using state-of-the-art scanning equipment, we meticulously capture every detail, color tone, and texture of your photographs. We understand that each image carries its own unique story, and our goal is to bring that story to life in the digital realm. Our dedication to the craft of photography enables us to deliver stunning results that reflect the original beauty and sentiment of your precious memories.


Our legacy is Preserving yours!
Whether it’s a small collection of family portraits or large format photos, banners, or murals, we approach each project with the utmost care and enthusiasm. We believe that by infusing our love for photography into every step of the scanning process, we can create digitised versions that truly resonate with you and evoke the same emotions as the original prints.
At Yesterdays Photo®, we are not just scanning and digitising photos; we are preserving your legacy and immortalising the artistry captured within each image. Join us on this journey as we combine our passion for photography with advanced scanning techniques, ensuring that your memories remain vivid and cherished for generations to come.
On-Location Scanning Solutions: Let Yesterday's Photo® Come to You!
We serve the greater Perth metropolitan area and its suburbs with our mobile scanning service for photographs, negatives and slides. However, we are prepared to travel anywhere in Australia if necessary to complete larger assignments and take a huge number of images.
We also put at your service our high-end photography equipment necessary to scan and digitise large size pictures, banners, and murals. For the best possible colour reproduction, we employ lights and strobes with a high CRI (Colour Rendering Index) in our scanning setup.
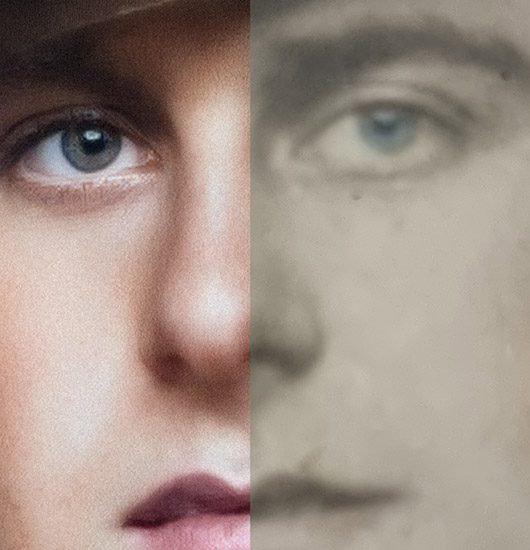
Here at Yesterdays Photo®, we promise to restore your photos to their former glory while paying close attention to every last detail and retaining the emotional impact of the originals.

Do you want to scan your old photos at home?
A quality photo restoration usually comes from a good scan
It is possible to restore photographs from a regular home scanner input or even your phone camera if the conditions are right, but a scanner with a resolution of 600 dpi or greater is highly recommended. This enhanced resolution captures more fine-grained information, facilitating a more seamless restoration procedure and yielding better overall outcomes. For a better end result, we at Yesterdays Photo® prioritise retaining as much data as possible.
Are you interested in digitising your cherished photos from the comfort of your own home? We’re here to assist you! At Yesterdays Photo®, we understand the significance of preserving your precious memories. To provide you with the best guidance for scanning your photos at home, read our post “Quick Guide to Scanning Your Photos at Home” a comprehensive blog article that offers specific details and valuable recommendations.
Our blog post covers various aspects, including selecting an appropriate scanner, determining optimal resolution settings, and properly handling and preparing your photos for scanning.
By following our recommended best practices for scanning photos at home, you can effectively preserve your cherished moments with precision and care.
Scanning Photos: TIFF vs JPEG
In the digital age, preserving memories through photo scanning has become increasingly popular. However, choosing the right format for scanning photos can be a daunting task. This guide will explore the differences between TIFF and JPEG formats, helping you make an informed decision.
Tagged Image File Format (TIFF) is a high-quality image format commonly used in the photography and printing industries. TIFF files are known for their lossless compression, meaning they do not lose any data when saved. This makes them ideal for archiving and printing.
Joint Photographic Experts Group (JPEG) is a widely-used image format known for its lossy compression. JPEG files are smaller in size, making them easier to store and share online. However, this compression can lead to a loss of image quality, especially after multiple saves.
1. Image Quality
- TIFF: Offers superior image quality due to lossless compression. Every detail of the original photo is preserved.
- JPEG: Uses lossy compression, which can result in a loss of detail and quality, especially with repeated editing and saving.
2. File Size
- TIFF: Produces larger file sizes, which can take up significant storage space. Ideal for professional use where quality is paramount.
- JPEG: Creates smaller file sizes, making it easier to store and share. Suitable for everyday use and web uploads.
3. Editing Flexibility
- TIFF: Allows for extensive editing without losing quality. Perfect for photographers and designers who need to manipulate images.
- JPEG: Limited editing flexibility due to compression artifacts. Frequent edits can degrade the image quality over time.
4. Compatibility
- TIFF: Widely supported by professional photo editing software but may not be compatible with all devices or web platforms.
- JPEG: Universally supported across all devices and platforms, making it highly versatile for everyday use.
Archiving and Printing
If you need to archive your photos or produce high-quality prints, TIFF is the best choice. The lossless compression ensures that every detail is preserved, making it ideal for long-term storage and professional printing.
Extensive Editing
For images that require extensive editing, TIFF provides the flexibility needed to make multiple adjustments without compromising quality. This makes it a preferred format for photographers and graphic designers.
Online Sharing
JPEG’s smaller file size makes it perfect for online sharing. Whether you’re uploading to social media or sending via email, JPEG files are quick to upload and easy to share.
Everyday Use
For everyday snapshots and casual photography, JPEG is a convenient choice. The reduced file size allows you to store more photos on your devices without worrying about storage limits.
For archiving and high-quality prints, TIFF is recommended. For everyday use and sharing, JPEG is more convenient.
Yes, you can convert JPEG to TIFF using photo editing software, but the quality will not improve beyond the original JPEG.
Scanning at a higher resolution can capture more detail, but it also increases file size. Balance your needs for quality and storage space.
Scanning at a higher resolution can capture more detail, but it also increases file size. Balance your needs for quality and storage space.
Get in touch
Our Postman will always deliver!
Our team is ready to help – no stamps required!