PROFESSIONAL SLIDE SCANNING SERVICES
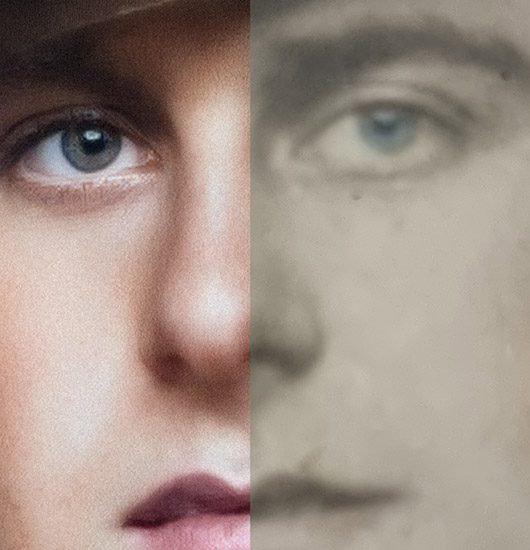
Revive Vintage Moments: Transforming Slides into Digital Treasures
Bring your memories back to life with our expert slide scanning services. We convert your 35mm slides to digital with care, precision, and clarity.
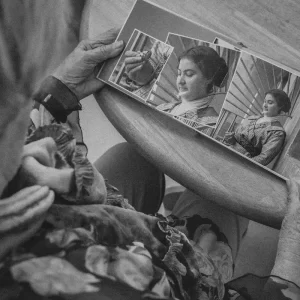
As you explore your collection, imagine the joy of rediscovering moments long forgotten — now captured in high resolution and preserved for generations to come. Using state-of-the-art scanning technology, our skilled technicians carefully digitise each slide, breathing new life into every image. This process reveals not only visual detail but also the emotion and atmosphere that make each frame unique.
SEND
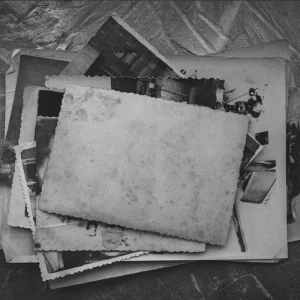
Submit your slides and analogue media in weatherproof, traceable packaging to ensure safe delivery. Once we receive your parcel, we’ll promptly confirm its arrival and condition.
Alternatively, if you prefer a more personal approach, we’re happy to receive your collection in person by appointment.
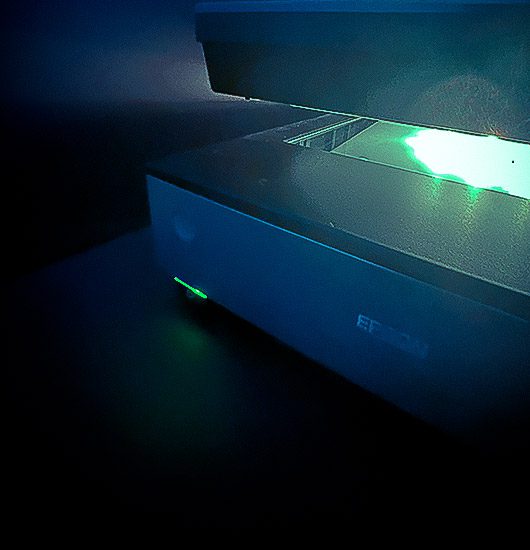
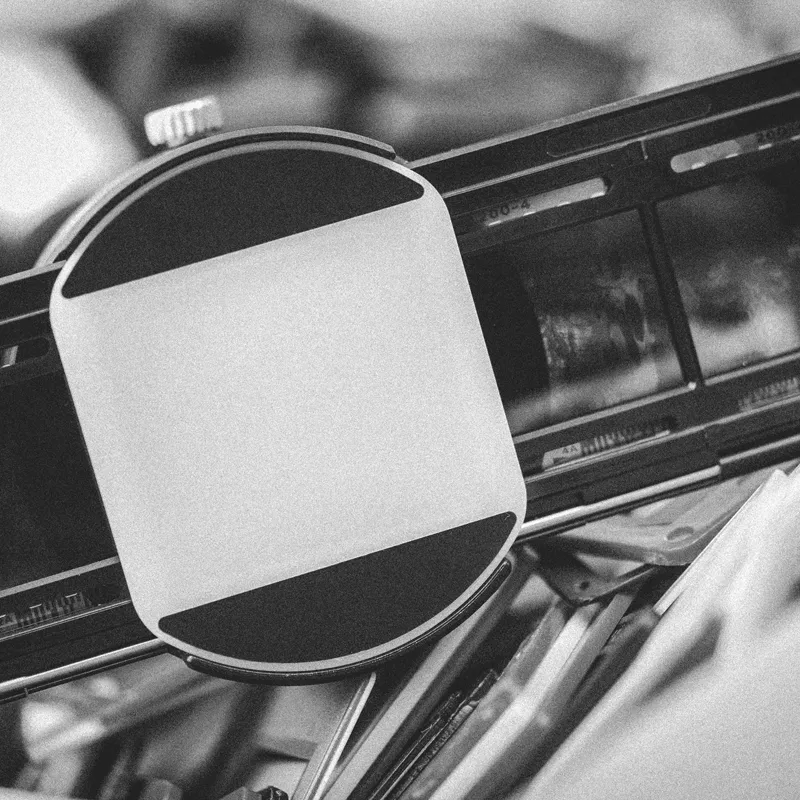
SCAN & RESTORE
Our dedicated team of photo restoration specialists carefully scans each slide by hand. Using professional-grade equipment and best-in-class practices.
We ensure the integrity of every image is preserved — with results that honour both the moment and the medium.
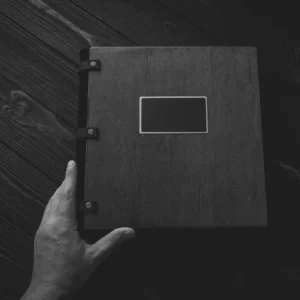
RECEIVE
Your original slides, along with any duplicates and digital files, will be returned to you with care.
For your convenience, digital copies can be delivered via email, SMS, USB drive WeTransfer, or Dropbox — whichever option suits you best.
Unlock Your Memories:
Seamlessly Transforming Slides to Digital Keepsakes!
In today’s digital world, slide scanning has become more accessible than ever. With a digital camera or smartphone, it’s possible to digitise slides at home for basic needs.
But photography began differently. Back then, images were captured in one of three forms: slides (reversal film), negatives, or prints.
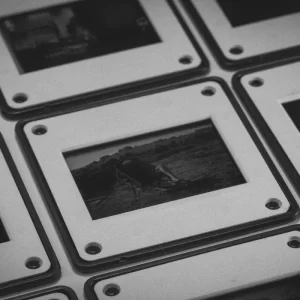
What Are Slides?
Slides — especially the classic 35mm format — were small, transparent film cutouts, often framed in cardboard or plastic. Inside each one lives a moment: a glance, a place, a memory.
The Rise of DIY Slide Scanning
Modern smartphones and digital scanners now offer surprisingly good results. They can convert your old slides into digital formats like JPEG or TIFF. This opens new possibilities: from creating fresh prints to sharing your memories in digital spaces.
However, scanning photos and slides at home — whether individually or in bulk — comes with limitations. Loss of detail, inconsistent colour, and poor lighting, inaccurate angles, and lens distortions that can heavily affect the final outcome.
Why Professional Scanning Makes a Difference
For those seeking true preservation and the highest possible quality, a professional scanning service is the key. At Yesterdays, we don’t just scan slides — we process history with care and respect.
Our process ensures:
Fidelity to the original image
Colour correction that respects the mood and tone
Damage suppression without distortion
High-resolution clarity, up to archival quality
More Than Just Scans
At Yesterdays, we specialise in the elegant transformation of analogue formats. Whether scanning slides or digitising negatives, we convert your collection into versatile digital formats — perfect for printing, archiving, or creating something new.
Want more than a digital file? We can turn your images into:
Fine art prints
Custom video presentations
Animated photo slideshows
Archival storage collections
Rediscover your legacy — frame by frame, colour by colour, with every detail preserved.

Slide into the Past:
Discovering the Unique World of Vintage Slide Formats
The 35mm Slide:

A PORTAL TO
THE PAST
SPECIFICATIONS
- Slide size: 2x2 inches
- Film size: 24mm x 36mm
- Standard slide size
Step into a realm of visual nostalgia with the iconic 35mm slide — a hallmark of the photographic landscape in the late 1970s. Revered as the most widespread slide format of its time, it symbolised an era defined by rich storytelling through images.
Crafted for Projection and Preservation
35mm slides are positive images, carefully developed from film negatives. Each one is housed in a protective frame, usually made of plastic or cardboard, with precise cutouts that guide the slide perfectly into projectors or viewing devices.
This thoughtful design allowed families, artists, and educators to project their memories in vivid colour, one frame at a time.
A Medium That Captured More Than Just Light
More than a format, the 35mm slide is a cherished relic of analogue history — a testament to a time when every framed image told a story. Whether shown on a living room wall or in a lecture hall, these slides transported audiences through carefully curated moments, frame by frame.
They remind us of the care once taken to compose, capture, and present photographs — not instantly, but intentionally.
The 126 Slide:
A SQUARE-FRAMED COUSIN
TO THE 35MM CLASSIC
SPECIFICATIONS
- Slide size: 2x2 inches
- Film size: 28mm x 28mm
- Square slide size
Step into the world of the 126 slide — a close cousin to the 35mm format, yet with a character all its own. Like its more common counterpart, it fits snugly into a protective sleeve. However, the 126 slide reveals a unique charm through its square film cutout, measuring approximately 28mm x 28mm, slightly larger than its original design intention of 26mm.
A Twist in Dimensions and Design
In this subtle shift in size, the 126 slide offers a larger, more balanced visual canvas. Its square format changes how images are composed and viewed, introducing a different rhythm to storytelling through projection.
Kodak led the way in popularising the 126 slide. Early versions came housed in sleek plastic sleeves, which later gave way to more economical cardboard frames — visually similar to those used for 35mm slides.
A Nostalgic Frame, A Distinct Voice
Through its evolution, the 126 slide has transitioned from plastic to cardboard, yet its purpose remains the same: to preserve square-framed moments with clarity and care. Each slide captures a scene, a glance, or a mood, held delicately within its squared sanctuary.
More than just a format, the 126 slide is a tribute to a time of photographic innovation — one where form subtly shaped how memories were both captured and shared.
The 127 Slide
(46mm):

ELEGANCE IN A
MID-FORMAT FRAME
SPECIFICATIONS
- Slide size: 2x2 inches
- Film size: 38mm x 38mm
- Large slide size
Introduced in the early 20th century, the 127 slide quickly found its place as a versatile mid-format film. Larger than 35mm yet more compact than 120, it bridged the gap between portability and image quality — a perfect companion for early amateur cameras and snapshot culture.
Over the decades, the 127 slide became a beloved format for families, hobbyists, and travelling photographers alike. Its square or rectangular frames offered room for more visual expression than smaller formats, without the bulk of professional gear.
Among the rich tapestry of vintage formats, the 127 slide at 46mm stands out as a quiet enigma. With its slightly narrower width, it deviates from standard 127 proportions, carving out a unique place in the history of slide photography.
A Refined Canvas Within the 127 Family
While preserving the core identity of the 127 format, this 46mm variation reimagines the frame — offering a more compact space for visual storytelling. Its specialised dimensions invite photographers to think differently, to compose within tighter boundaries, and to discover new creative rhythms.
A Whisper of Nostalgia in Every Frame
Unlike its more conventional cousins, the 127 slide (46mm) holds a certain intimacy. It invites closer inspection — not only of the image, but of the subtle craft behind each exposure. Despite its smaller scale, it offers an evocative depth that speaks volumes in a single frame.
These compact slides remain a quiet but treasured part of photographic heritage, ready to be digitised, revisited, and reimagined for the modern age.
120 Medium Format

SPECIFICATIONS
Stepping into the 120 Medium Format Slide, one enters a realm of photographic grandeur. This revered format, known for its larger dimensions, presents images of exquisite detail and depth. With a generous frame, often varying between 60mm x 60mm, 60mm x 45mm, or 60mm x 90mm, this majestic slide captures scenes with an immersive richness, elevating storytelling through its expansive canvas.
As a cherished favorite among discerning photographers, the 120 Medium Format Slide reigns supreme in the realm of visual narratives. Its larger-than-life stature and detailed imagery stand as a testament to its revered status among the cherished relics of vintage photography.
110 Pocket Film
(Mini-Slides)

SPECIFICATIONS
Renowned for its simplicity and small stature, this “pocket slide” captured moments effortlessly, creating smaller images ideal for casual prints or mementos. As an ode to this historic cartridge, the 110 slide encapsulates the charm and nostalgia of that bygone era, preserving its compact essence for modern-day photography enthusiasts.
- Slide size: 1x1 inch
- Film size: 17mm x 13mm
- Miniature slide size
127 Superslide
(48mm)

SPECIFICATIONS
Behold the Red Herring of Slides: The enigmatic 127 Super Slide at 48mm, a fabled variation nestled within the lore of photography. Whispers weave tales of this elusive deviation from the classic 127 slide, boasting an uncommon film width. Said to retain the essence of the original format while offering a specialised perspective, this legendary rarity emerges as a red herring among vintage slides, cloaked in the mystique of a treasured collectible.
- Slide size: 2x2 inches
- Film size: 48mm x 48mm
- Large slide size
Frequently Asked Questions
Why should I digitise my old 35mm slides?
Preserving your slides in digital form means safeguarding memories that may never be repeated. Film fades, storage conditions change, and time takes its toll. Digitising ensures those fleeting moments — family gatherings, holidays, portraits — can be enjoyed, shared, and archived with ease for generations to come. Sometimes even to discover a part of your history that remain hidden, slides are difficult to appreciate with the naked eye and transparencies projectors are difficult to get.
Can I convert 35mm slides to digital at home?
Yes, it’s technically possible to convert 35mm slides to digital at home using a flatbed scanner with a transparency adapter or a dedicated slide scanner.
However, these methods can be time-consuming and often result in lower quality scans due to limitations in consumer-grade equipment.
Professional slide scanning services and negatives scanning like ours offer high-resolution scanning, colour correction, dust and scratch removal, and consistent results across large slide collections — saving you both time and effort while preserving your memories with archival quality.
What makes your service different from bulk scanning?
We don’t batch process, We handle family collections. Each slide is gently air-dusted, individually scanned using high-end flatbed technology at resolutions up to 6400 dpi or higher upon request, and carefully adjusted for colour, clarity, and orientation. This hands-on approach takes more time, but it results in a finished image that feels truer to the moment it captured and most of all future proof.
What format will my scanned slides be in?
We typically provide high-resolution JPEG files suitable for everyday use, sharing with family, and digital storage. For clients seeking archival preservation or print-ready quality, we also offer TIFF format upon request.
All scanned files are delivered via a secure online download link (Dropbox), and we can also supply them on a USB device if preferred. Each slide is scanned individually to ensure the highest clarity, colour fidelity, and detail.
What’s the ideal resolution for scanning slides?
Usually we recommend scanning slides at least at 3200 dpi as tiff files, which allows for beautiful enlargements, raw image information, supports archival storage, and can provide crisp detail (depending on the input), even from small originals. It’s more than enough for most professional and personal uses, including gallery-quality prints.
Can you turn my old slides to digital even if they're faded or damaged?
Yes — and we do it with exceptional care. Turning slides to digital isn’t just about creating a quick scan. It’s about preserving something irreplaceable.
We begin by gently air-dusting each slide to remove surface particles without harming the film. From there, we scan each one individually using high-resolution, professional-grade equipment — often between 3200 and 6400 dpi, depending on the format and condition. This ensures we capture every possible detail.
Faded or slightly damaged slides can still be digitised with beautiful results. Our post-processing includes manual adjustments for colour balance, exposure, and orientation — all done by hand, never through batch automation. For heavily damaged or timeworn slides, we also offer optional restoration services, where we can repair discolouration, scratches, or mould artefacts using fine-tuned digital retouching.
Whether you’re looking to archive family memories or create high-quality files for printing or video, our service is designed to turn your slides to digital with the utmost respect for the original material.
How do you ensure the quality of each scanned slide?
Each 35mm slide is cleaned and inspected before scanning to remove surface dust and minimise imperfections.
We scan using professional-grade equipment at up to 6400 dpi, ensuring crisp detail even in small images. Our process includes manual cropping, orientation correction, colour balancing, and light image optimisation.
We don’t batch process or use auto feeders — this personalised attention ensures your memories are preserved as beautifully and accurately as possible.
Why We Don’t Rely on Digital ICE
While many high-volume labs use automated dust and scratch removal technologies such as Digital ICE, we’ve found that this method often falls short. In our experience, it can leave behind digital artefacts, soften fine detail, and occasionally misinterpret image features — particularly in older or textured slides.
Instead, we take a manual approach to restoration. Each slide is gently air-dusted before scanning to prevent physical particles from becoming part of the digital file. After scanning, any visible dust or marks are carefully removed in Adobe Photoshop, by hand — ensuring the integrity of the image is preserved without sacrificing detail or introducing unwanted distortion.
It takes more time, but the results are cleaner, sharper, and more faithful to the original. We call it HomeMade!
Can damaged or faded slides still be digitised?
Yes. Many older slides suffer from fading, discolouration, or physical damage over time. While basic scanning captures the image in its current state, we also offer photo restoration services for clients who want to recover and enhance severely damaged slides. This includes advanced colour correction, exposure balancing, and digital repair of scratches, mould spots, or fixing water damage. Restored files can be delivered in high-resolution formats for printing or archiving.
What types of slides can you scan?
We specialise in scanning standard 35mm mounted slides (in plastic or cardboard frames), but we can also handle other formats like 126, 127, 110, and even glass-mounted slides in certain cases. If you’re unsure what type of slides you have, just send us a photo or measurement — we’re happy to advise. All slides are handled with care using cotton gloves and anti-static tools to avoid further damage or deterioration during scanning.
How should I prepare my slides before sending them?
Just keep them in their existing sleeves, boxes, or carousels — no need to clean or rearrange. If you’d like to send them in a particular order, simply label each group or box. We’ll take care of the rest with steady hands and cotton gloves. Here are some useful tips on photo preservation
Can I ship my slides to you?
Yes — you can send your slides to us by post, and we take every precaution to ensure their safe arrival and immediate notification when in our hands. These are original transparencies, often irreplaceable, and we treat them as such.
While we prefer a direct handover whenever possible — to review your collection with you in person and get to know and understand your history and requirements — we understand that’s not always practical. If you choose to post your slides, please follow these important steps to protect your collection:
Shipping Guidelines for Your Slide Collection
Use Registered Post with Signature on Delivery for full tracking and proof of receipt
Insure your parcel based on the estimated value of your collection
Pack slides securely in sturdy boxes with foam or bubble wrap to prevent shifting
Use archival slide boxes or sleeves where possible — avoid rubber bands or loose bundling
Seal the package with waterproof material or place the contents inside a weatherproof bag within the parcel
Clearly label your name and return address on both the outside and inside of the parcel
Include your contact details and any notes about how you’d like the slides grouped or scanned
Avoid using padded envelopes — they don’t provide enough protection for mounted slides
We recommend Australia Post or a trusted courier with consistent handling policies
We will notify you upon safe arrival and treat your materials with absolute care throughout the digitisation process.
If you require your slides to be returned by post, we’ll apply at least the same level of protection and care when packing them for the journey home. Return delivery will be charged accordingly, including the cost of secure packaging, insurance (if required), and postage or courier services. We’re happy to tailor the return method to your preference — whether that’s express, signature required, or insured delivery.
PLEASE NOTE: THE RESPONSIBILITY FOR YOUR COLLECTION REMAINS WITH THE CHOSEN CARRIER AT ALL TIMES WHILE THE PARCEL IS IN THEIR CUSTODY.
If you have any concerns or would like guidance before sending your collection, just get in touch. We’re here to help.
Why does your slide scanning service cost more than some of the cheaper options I’ve seen?
It’s a fair question — and the honest answer is that we do things differently. While cheaper services often rely on automated batch scanners and minimal adjustments, we take a hands-on, careful approach. Each slide is individually air-dusted, scanned at high resolutions (up to 6400 dpi), and manually adjusted in photoshop for colour, exposure, and orientation. Nothing is rushed, and nothing is run through a machine without attention.
This takes more time and skill, but what you get is more than just a quick digital copy — it’s a beautifully preserved version of a memory that may never be captured again. While is not a dedicated photo restoration session, We treat your photos with the same care we’d give our own family’s history, and we believe that’s worth doing right.
How long will it take to scan my slides?
Turnaround depends on the size and condition of your collection. For small batches, we aim for 1–2 weeks. For larger archives, we’ll provide a clear timeline after reviewing the collection condition and size.
Do you also scan photographs, negatives, or large format prints?
Absolutely. In addition to slide scanning, we offer high-quality digitisation for a wide range of photographic media. Whether you’re working with vintage family prints, delicate negatives, or oversized originals, our team handles each item with precision and care.
For old family photos and studio portraits, visit our Photo Scanning Services page.
If you’re looking to preserve film, explore our Photo Negative Scanning service.
For artworks, albums, or larger pieces, we also offer bespoke Large Format Scanning solutions by request.
No matter the format, we treat every piece as a one-of-a-kind original — carefully prepared, professionally scanned, and optimised for lasting preservation.
Confidentiality & Handling Ethics
Your slides are more than just images — they’re fragments of a life lived, of people, places, and moments that matter deeply. We treat every collection with absolute discretion, respect, and integrity.
All handling is done in-house, by trusted hands. Your materials will never be shared, duplicated, or accessed by anyone outside our studio. We do not upload, publish, or retain your images beyond the agreed delivery timeframe. Once your digitised files have been transferred and confirmed, they are safely removed from our active system unless you’ve requested short-term backup.
We understand that some images carry personal, emotional, or even private significance. Our commitment is simple: what you share with us stays with us — respectfully handled, carefully digitised, and always kept confidential.
Pen a Message and send us a snapshot of your photo
A Journey Through Time Begins here!
Correspond
with Us!
Drop us a message if you have any questions or seek personalised services, art commission, assessments, or estimates. Our team is committed to promptly assisting you!
Remember, no stamps required! We’re just a click away.

Count on Our Postman for a Timely Deliver!
po*****@************om.au
Street: 2A Talbot Way,
City: Woodlands
State: Western Australia
Postal code: 6018
Mobile: +61 4 9785 9034