Photo Enlargement

Photo Enlargement sample, a blurry photo of grapes next to a sharper and detailed set of grapes, same section of a photo showing evident quality upgrades

PHOTO ENLARGEMENT

Enlarge & embellish your cherished memories

Boost Image size and clarity for your photos!

and bring your blurry photos back to life!

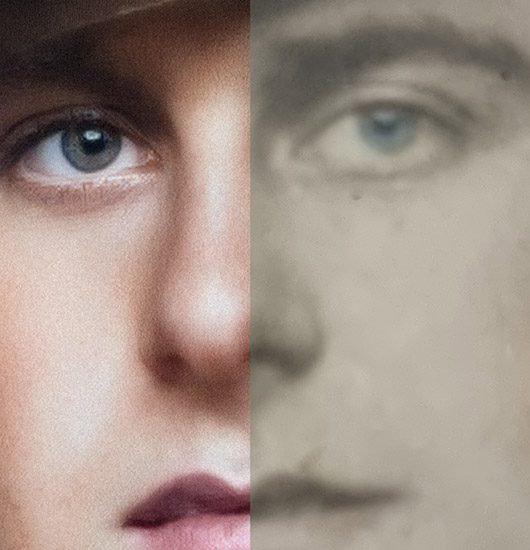
Experience the Magic of Photo Enlargement! Make Your Photos Larger and Sharper, Just as You Remember Them! At our photo service, we delicately refine fuzzy pictures, striving to restore clarity while preserving their familiar, original feel. Our commitment lies in reviving your cherished memories while safeguarding their authentic essence.

Original photo before restoration and enlargement, heavily pixelated photograph and the only input supplied by the client Restored photo, enlargement and colourisation resulting in a sharper image

Ready to magnify your memories?

Submit a snapshot for a free assessment

Did you know that we can enlarge your photos?

Yes, we're equipped to upscale most of your low-resolution images, whether they're small prints or digital.

When it comes to enlarging images, it’s a real challenge in our photo restoration work. Getting rid of fuzziness and blur can seem demanding, especially when starting with a small digital picture.

You see, digital images are made up of pixels per inch (PPI). If we try to make a picture bigger using the usual methods, it ends up in Pixelated images, the tiny squares that compose an image, become visible and losing its overall quality.

This occurs when an image is enlarged beyond its original size or resolution, causing the pixels to stretch and lose their clarity. When this happens, the image appears blocky or jagged, lacking smoothness and detail. It’s akin to looking at a picture made up of large, visible squares instead of a seamless and clear visual. Generally, pixelation degrades the quality and sharpness of an image, impacting its overall appearance and making it challenging to discern finer details.

But here’s the good news: technology and computer smarts, like artificial intelligence (AI), can really help in making pictures larger and better for fixing them up. However, these AI-generated changes do have their limits. Sometimes, they might mess with the original look of the photo, leaving behind distorted images or weird artifacts. That’s where a proper damage assessment and human expertise and an artistic photo restoration touch really shine.

Even with tools like Adobe Photoshop and its cool “preserve details 2.0” option, it’s still really important to understand that the real magic comes from skill and craftsmanship. Not every photo can be fixed with just a few clicks.

Original image featuring visible pixels before undergoing our restoration process. The woman's face lacked clarity and appeared pixelated. Enhanced image post-processing by our expert photo restoration team, showcasing a clear, refined depiction with no visible pixels. The woman's face appears remarkably crisp and detailed

Our way of working isn’t just about tools and tech. We pay attention to scanning properly and digging into materials and textures. We’ve got our own special set of moves and brushes to make photos as good as they can be.

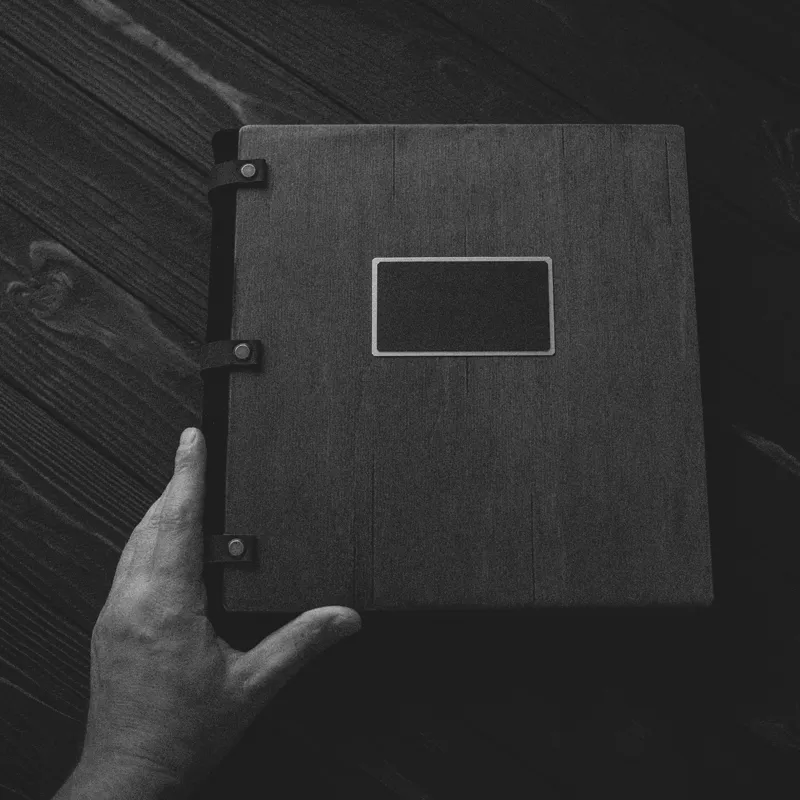
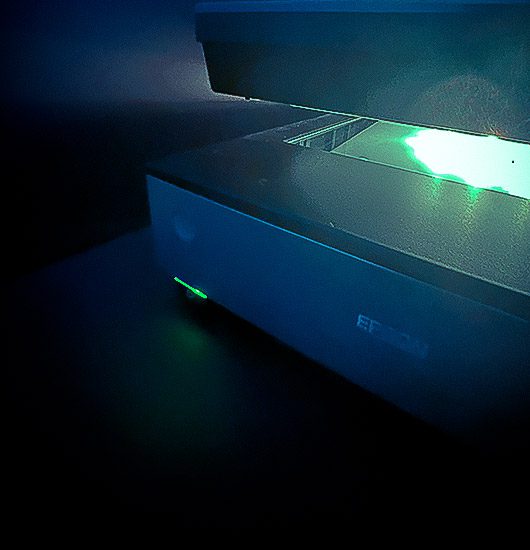
When it comes to making photos bigger, scanning them directly from the negatives or transparencies is usually the best bet, although many people forget about this option. If you’re looking to scan your photos yourself, here are a few things to keep in mind.

low resolution image before enlargement and enhancement Photo enlargement and resizing result after applying our photo enlargement algorithm and showing excellent signs of detail recovery and photo enhancement

Fix blurry and pixelated Photographs

Despite your best effort sometimes you do not have access to an original photo to perform a good image scan, this may happen for many reasons; 

However, not all is lost as most of the images can be totally or partially recovered, at yesterdays photo restoration we can help!

Our photograph restoration enlargement process involves:

Tailoring your images for perfect sharing and viewing

Our photo enlargement process can preserve the original file format or convert your files to JPEG, JPG, TIFF, TIF and PNG and export in your desired colour profile.

Low-resolution images used to be a challenge to restore, especially when some damage is present, hence our process may involve a restoration process before upsampling your image as it will prevent enlarging unwanted defects on the input photograph.

We can improve the condition and structure of the original picture you provide us with, using methods such as interpolation, bicubic smoother and bicubic sharper, bilinear and preserve details 2.0 for enlargement and nearest neighbour pixel selection.

Although not all photos are likely to be enlarged, we can achieve outstanding results. We can automate the enlargement until a certain level. The rest is just the magic of our craftsmanship.

We also put a lot of love and the artistic touch using the Procreate app in the iPad ensuring that your photo enlargement turn into a piece of art.

See the amazing changes!

Low Resolution and pixelated image before our editing works Edited image after enlargement using photoshop and procreate

Making small digital photos big and clear!

Our photo restoration specialists can assist you upscaling small images avoiding significant noise distortion or quality loss caused during the process, get in touch and let us show you the bigger picture

Depending on the condition and quality of the input, our algorithm and resampling methods can reduce distortion, sharpen blurry areas, noise and “artifacts” significantly and in some cases recover details and convert a low resolution photo into a sharp high-resolution master piece

Discover more about our advanced restoration techniques and methods in our comprehensive guide on ‘Scanning Tips for Effective Photo Restoration

Photo Enlargement sample, a blurry photo of grapes next to a sharper and detailed set of grapes, same section of a photo showing evident quality upgrades

Pen a Message and send us a snapshot of your photo

A Journey Through Time Begins here!

Correspond
with Us!

Drop us a message if you have any questions or seek personalised services, art commission, assessments, or estimates. Our team is committed to promptly assisting you!

Remember, no stamps required! We’re just a click away.

Pan pacific scout jamboree stamp

Count on Our Postman for a Timely Deliver!

postman@yesterdays.com.au

Street: 2A Talbot Way,
City: Woodlands
State: Western Australia
Postal code: 6018

Mobile: +61 4 9785 9034

How much photo restoration costs?

Before and after pattern suppression and restoration techniques have been applied to a textured photo

Restoring a photo to its former glory is a valuable investment usually ranging from $89 to $489 – a price determined by the extent of damage, size, and restoration time required. Larger photos and those requiring specialised printing, like canvas or metal, may incur additional costs. Investing in restoring your photos will ensure their prolonged life and cherished memories for years to come.

Continue reading

Dust & Scratches Removal

holes dust and scratches on a child portrait

REMOVE DUST & SCRATCHES

from your old photographs

How to safely remove dust from your photos?

Dust is one of the silent killers of a photograph

Photographs are incredibly valuable for our lives, they are a communication channel with the younger generations and a way to preserve our history and pass on our legacy.

If you have plenty of photos stored in an old shoebox or in an album, you need to realise that wether you want it or note, these are degrading day by day as the pass of time do not contribute to preserve them, and dust is one of the major silent killers of a photograph.

Dust and particles contribute to the Physical or mechanical damage, which is one of the most common causes for photo deterioration, every time you get them out of their album or you scramble them in your hands a small amount of deterioration by friction is happening, sometimes not noticeable but progressively destroying your memories.

This means that dust and scratches, which may have built up over time, are a major obstacle to overcome, here are some tips on best practices to preserve your photos and deal with dust in a smarter way:

Halt! The Reason You Shouldn’t Simply Dust Off Your Old Photographs

Although it may seem like a good idea to just wipe the dust, particles or built up off a picture with a towel or tissue, doing so might actually do more harm to the original. The reason for this is because wiping a picture with a cloth or tissue might harm the photo’s fragile emulsion layer if dust particles are present, particularly if they are attached to the surface of the photo.

Use a soft-bristled brush or air blower to get rid of dust from an image. To remove loose dust without disturbing the emulsion layer, use a soft-bristled brush, such as a camel hair brush. Loose dust may be blown away using an air blower, such as a hand-held bulb blower or a compressed air canister, without touching the picture itself.

If the dirt or grime on the picture is too resistant to be cleaned using a brush or air blower, it may be better to have a professional conservator clean the photo in a safe and effective manner. 


hand with gloves holding a swap to prepare photo for scanning

Keep in mind that preventing harm to a priceless photograph is always preferable than attempting to restore one that has already been compromised and please DO NOT use Chemicals or alcohol based products.

A good scanner is handy, but good scanner practices are imperative!

Old photo scanning services

A Scanner provides a controlled environment to process your old photos, there are many options in the market to suit your specific needs, starting from mobile or home versions,  professional flatbed  scanners and up to aereal or drum scanners that provide museum quality results.

Assuming that you own a reasonable quality flatbed scanner you can do this at home following our recommended scanning guidelines including cleaning your scanner, setting up bith and depht, a 600dpi minimum resolution and always scanning in colour (Yes even black and white or sepia photos)

Alternatively you can contact us and send us your photos for a damage assessment or for bulk scanning (We know how to handle them with care) or visit our photo restoration price guide to get an idea of the services we provide 

Some picture scanners are better than others when it comes to digitising your old family snapshots. Better quality scans amplify the results of the restoration because of the increased detail and resolution and colour processing that comes from using a high-quality scanner.

If you want to preserve the quality of the original picture, you’ll can benefit from a scanner with a high enough resolution and specifications.

Effective scanning procedures are a massive part of the result obtained from the digitising operation.

These include but are not limited to:

  • Making sure the picture is completely wrinkle- and fold-free before placing it on the scanner bed.
  • Carefully removing, grease dust and dirt from the scanner glass as it may introduce new flaws into the digitised picture, so keeping it clean is essential.
  • Scanning the image from different angles
  • Use a proper configuration and software
  • Prevent and avoid vibrations on the scanners surface

Scanning is a good way to get your images digitalised and the first step to get your photos into photoshop to make them look they way they used to or even better, hence the importance to get this right since the beginning, (Check on our article tips to scanning photos or visit our blog if you are facing those nasty honeycomb paper textures)

What Causes Scratches in an Old Photograph?

An antique photograph’s surface may develop scratches for a number of different causes over time. These may include the photograph being handled improperly, being stored incorrectly, or being exposed to dust or harder surfaces or elements, even deliberately scratched.

Scratches are also possible to appear on a photograph if the emulsion layer has been scraped or damaged in any way.

It is essential to handle old photographs with care and to preserve them in a location that is both cool and dry to reduce the likelihood that they will get scratched or even cracked.

It is best to avoid exposing the photographs to direct sunlight or temperatures that are very high, since doing so might cause the emulsion layer to get damaged and result in scratches.

Additionally, you should avoid using any materials, such as sticky tape or other substances that can leave a residue on the picture.

Scratched photo of Australian aircraft - three RAAF Beaufort bombers

Do not add Dust!

When scanning a photo in a good resolution (starting at 600dpi) we are enlarging the area of the photo and therefore enlarging any issues therein contained, as these are going to be severely magnified, we o not wat to add an extra layer of problems by adding dust and other particles onto the scanning process, so make sure that your photo and scanner glass are very clean. 

Have in mind that there are recommended methods and products to clean your scanner so do not take this process lightly and abide to the manufacturer recommendations. Also have in mind that friction can damage your photo further so take the proper preventative measures to preserve them.

Best photo restoration results are often consequence of a good preparation of the photos, a clean scanner and resolution of at least 600dpi and 16 bit depth when scanning.

Man holding a magnification loupe to assess the damage of a photo prior estimating the photo restoration services
Black manual air duster or air pump

Air Dusting: A Safe and Effective Way to Remove Dust from Photos

In addition to using a good scanner and following proper scanning practices, clean surfaces are essential to achieving good results. Both the glass on the scanner bed and the photo itself should be cleaned thoroughly before scanning. Any dust or debris on the surface can be captured by the scanner and become part of the digitized image. Preparing the photo before scanning is also important. Any loose debris or dust should be removed from the photo with a soft brush or compressed air. It’s also a good idea to handle the photo by the edges to avoid leaving fingerprints or other marks on the surface

Using Adobe photoshop’s, Dust and Scratches filter.

Retouching photos may be accomplished with the use of Photoshop’s dust and scratches feature, which is a tool. It does this by minimising the visibility of flaws such as minor scratches and dust particles in a picture.

Although it has the potential to be a helpful tool, it is not without both advantages and disadvantages.

The capability of the dust and scratches function to erase minor flaws from a photograph in a fast and uncomplicated manner is one of the most significant benefits of using this feature.

When compared to the alternative of manually removing each individual scratch or speck of dust, it can save a significant amount of time. Additionally, it is a non-destructive tool, meaning that the original image is not altered and the changes can be undone if necessary.

photoshop interface showing, dust and scratches filter over the image of two girls being edited
image detail before dust and scratches filter is applied dust-and-scratches-supression-after

Dust and scratches filter limitations

However, utilising the dust and scratches feature does come with a few limitations that you should be aware of. One of the primary problems is that it often causes the edges of a picture to become blurry. This can result in a loss of detail and make the image look less sharp. In addition, using the function excessively can result in the image losing its texture, which can cause it to appear artificial. This issue can arise if the function is applied too heavily.

It’s possible to make too much use of the dust and scratches feature, which is another problem with it. It is possible that the picture may take on a “plastic” appearance if it is applied too thickly or too often, giving the impression that it has been over-edited. It is essential to make use of the instrument in a measured manner and only when absolutely required.

Pen a Message and send us a snapshot of your photo

A Journey Through Time Begins here!

Correspond
with Us!

Drop us a message if you have any questions or seek personalised services, art commission, assessments, or estimates. Our team is committed to promptly assisting you!

Remember, no stamps required! We’re just a click away.

Pan pacific scout jamboree stamp

Count on Our Postman for a Timely Deliver!

postman@yesterdays.com.au

Street: 2A Talbot Way,
City: Woodlands
State: Western Australia
Postal code: 6018

Mobile: +61 4 9785 9034

Damage assessment

Old photo damaged by water or humidity in the lower third section

PHOTO DAMAGE ASSESSMENT

A Guide to Expert Photo damage Evaluation

Planning your photograph restoration

Damage Analysis for Effective Photo Rehabilitation

Damage assessment over an old photo using a magnifier and revealing a honeycomb pattern

ASSESSING THE DAMAGE OF YOUR OLD PHOTOS

Vintage photographs frequently exhibit not just fading, but also the presence of blemishes, delicate fractures, voids, and a variety of impairments that can span from minor to significant. The process of rejuvenating these images encompasses a meticulous evaluation of the deterioration, followed by the formulation of a comprehensive restoration strategy. This meticulous approach is aimed at remedying the impairments that mar your invaluable reminiscences, ultimately ensuring their revival to their former glory.

At yesterdays we map-out a restoration strategy before engaging works to understand the degree of the damage across and if the damage affects vital areas of the photo such as a face or eyes in a headshot, or dominant elements in the photo composition.

This means that there are photos easier to restore than others, therefore by evaluating the damage of your photo we can categorise the restoration as:

UNDERSTANDING THE DAMAGE OF YOUR PHOTO

The most common damages in old photos

Photographs serve as cherished vessels of our life’s most treasured moments. For those fortunate enough to inherit vintage family photos or other invaluable personal artifacts, the journey to safeguard their legacy takes center stage. In a world where the art of preservation is often overlooked, this guide aims to illuminate the path to sustaining these precious heirlooms.

Capturing the essence of time, these photographs encapsulate laughter, milestones, and irreplaceable connections. Yet, the passage of time can cast a shadow, leading to the gradual erosion of these captured memories. Whether through exposure to environmental elements, improper handling, or storage negligence, the potential for damage looms.

This article delves into the nuances of photo damage, unraveling the common culprits that threaten to fade, degrade, or distort these visual treasures. By understanding the intricate web of potential harm, you can empower yourself with the knowledge needed to shield your photographs from the passage of time.

From the subtle embrace of sunlight to the subtler threats of humidity and temperature fluctuations, photographs are engaged in a constant battle for preservation. Delicate as they are, these prints can suffer from fading, discoloration, and physical deterioration if not shielded from harm’s way.

Moreover, the absence of a proper storage and protection plan further exposes these artifacts to jeopardy. Unintentional mishandling, inadequate framing, and improper storage conditions can expedite the wear and tear that comes with the passing years.

Fear not, however, as a treasure trove of wisdom awaits within this article. Gain insights into the vital measures that can be taken to ensure the perpetual vibrancy of your photographic keepsakes. Learn about archival-grade storage solutions, handling techniques, and environmental control methods that form the armor against the relentless march of time.

By arming yourself with knowledge, you stand as a guardian of memories, preserving the emotional tapestry woven within each photograph for the generations to come. Embark on this journey to comprehend, prevent, and combat the forces that seek to undermine your cherished memories. Your photographs deserve nothing less than an eternity of admiration, and with the guidance provided here, you can elevate yourself from a mere spectator of time to its empowered custodian.

Physical Damage

holes dust and scratches on a child portrait
Dust & Scratches

Light scratches and dust

Spider cracks on an old photo, series of crack damage in a photo that for a spiderweb pattern
Spider Cracked

Several cracks with a spider-web pattern

Old photo with pin holes and punctures in vital areas
Holes & Punctures

Photos damaged by pins or stapplers

Photo damaged by heat or fire, lower left corner burnt

Fire damaged

Heavily damaged photos

Old photo damaged by water or humidity in the lower third section

Water damaged

liquid or water-stained photo

Torn photo in lower corner

Torn apart

Photos with missing pieces

STAINING, FADING & COLOUR SHIFTING

old photo faded, blurry images and colour information lost and hardly recognisable faces

Faded Photos

Photos faded and clarity loss

stained photo damage in the upper corner and faded colour

Stained Photos

Colour marks on photos

Faded colour photo damaged by the effect of UV rays and physical interaction

Color casts & Shadows

Parasite lightning and textures

holes dust and scratches on a child portrait

Damage by Dust and Scratches on photographs

Unavoidably, dust will stick to your photograph surfaces at any point exposed to the environment. Dust particles on a photograph are likely to scratch the photo when friction is applied when holding, passing or when cleaning. Naturally occurring dust can also cause damage if it contains sand grains which are abrasive and can scratch photographs in ways similar to those caused by human handling.

Dust and scratches are probably the most common damage found on an old photograph after digitising it as this process exposes them further than before. This damage becomes more evident when digitising as you are magnifying every little scratch making it appear larger than it really is!

Storing your photographs properly can help prevent them from getting scratched. Minimising the manipulation of your photographs also helps keeping them safe. If you have a photograph that needs some help, our photo restoration specialist can remove the dust and scratches digitally and heal your photograph with an extremely detailed technique making these as good as new.

If your old photograph has dirt, sand, or residue on it, you may be able to clean the image by hand. Wear soft gloves, and gently remove the dirt with a soft brush or soft-bristled toothbrush. If there is a large amount of dirt, the photograph may be gently rinsed under warm running water (depending on the paper) . Use your finger to softly wipe away dirt, but take care not scratch the photo. Let the photograph dry in a dark place.

old photo faded, blurry images and colour information lost and hardly recognisable faces

FADED PHOTOGRAPHS

Faded photographs are among the most common damages to collectible photographs. Fading occurs when a photograph is exposed to sunlight or stored in a place that is too hot or too cold.

The most common types of fading are:

  • Color fading- this type of damage occurs when the image becomes lighter in tone, with less contrast and colour contrast. It may also be accompanied by tonal irregularities (e.g., blotches) which can be seen especially on dark areas within the image area

  • Texture loss- this type of damage causes areas of fine detail to become blurred and smooth out, resulting in significant loss of information or distortion due to over-aggressive restoration techniques

  • Dimensional changes- dimensional changes result from either poor storage conditions or improper handling and handling after being removed from its original mount (frame).

What can be done? We offer a restoration service for faded photographs. Our experienced experts will carefully evaluate the condition of your photograph and recommend the most appropriate treatment. We can restore faded photographs achieving uniform colours, boosting colours and bringing back to life the original image.

Even if your photograph has become so light that it is almost impossible to see anything, it may still be possible to recover some visual information with our proper scanners. This means that a faded photograph can be restored to achieve uniform colour


Old photo damaged by water or humidity in the lower third section

Water damaged photographs

Water damage is one of the most difficult type of damage to restore in photographs. Water can cause a lot of problems to your photograph and it is important that you understand what happens when you get water on your images, so that you know how best to restore them if they are damaged by water.

Water can cause the emulsion to separate from the glass or plastic base it sits on which results in a white haze appearing over part of the image. This can result in staining and fading as well as discolouration and distortion. If it gets very wet then it may even start mould growing on it which will also lead to further damage to your pictures if left untreated for long enough!

If wet photographs are dried out but not treated properly before attempting any photo manipulation, they will never restore their original quality but will remain damaged forever with no hope of ever being fixed again unless brought back into expert hands like ours.

holes dust and scratches on a child portrait

Damage by Dust and Scratches on photographs

Unavoidably, dust will stick to your photograph surfaces at any point exposed to the environment. Dust particles on a photograph are likely to scratch the photo when friction is applied when holding, passing or when cleaning. Naturally occurring dust can also cause damage if it contains sand grains which are abrasive and can scratch photographs in ways similar to those caused by human handling.

Dust and scratches are probably the most common damage found on an old photograph after digitising it as this process exposes them further than before. This damage becomes more evident when digitising as you are magnifying every little scratch making it appear larger than it really is!

Storing your photographs properly can help prevent them from getting scratched. Minimising the manipulation of your photographs also helps keeping them safe. If you have a photograph that needs some help, our photo restoration specialist can remove the dust and scratches digitally and heal your photograph with an extremely detailed technique making these as good as new.

If your old photograph has dirt, sand, or residue on it, you may be able to clean the image by hand. Wear soft gloves, and gently remove the dirt with a soft brush or soft-bristled toothbrush. If there is a large amount of dirt, the photograph may be gently rinsed under warm running water (depending on the paper) . Use your finger to softly wipe away dirt, but take care not scratch the photo. Let the photograph dry in a dark place.

Photo damaged by heat or fire, lower left corner burnt

Fire damaged photographs

For most people, the thought of their treasured family photographs being damaged or destroyed is unimaginable. Unfortunately, fires happen and photographs can be affected by soot from smoke or even candles. Fires can also cause water damage coming from pipes or firefighters efforts under a conflagration, which can affect paper photographs as well as photographic prints.

The good news is that we have restored many fire damaged photographs over the years and will do our best to restore yours too! 

The first step in any restoration project is to carefully examine the damage to determine whether it can be restored digitally or not . If there are only small areas affected by fire damage then we may be able to repair them digitally; however if they are badly burned in places an expert may recommend removing them completely before restoring them  It’s important that you understand there are no guarantees when working with an old photograph damaged by fire, specially if vital areas are affected, however rest assured that every effort will be made to return these irreplaceable memories back into your possession in a condition as close to their original state as possible

Fire damage is perhaps one of the worst ways for your photos to be damaged. We understand that you may have lost many irreplaceable memories as well as precious heirlooms in this tragic event, which makes it all the more important to try and bring them back into their original condition if possible.

old photo faded, blurry images and colour information lost and hardly recognisable faces

Mould damaged photographs

If a photograph has been exposed to excess moisture, it can become vulnerable to mould growth if not properly stored in a cool, dry place. 

Mould can grow on your photographs and cause significant damage which may be impossible for you to repair yourself. The best way to avoid this kind of damage is by storing your photos in an environment that is low in humidity and temperature so they don’t become damp and start growing mould. 

We recommend storing them in plastic sleeves or archival boxes with desiccants inside until you are ready to display them.

if you find that there are signs of mould on your photographs it may be possible to remove the mould with a soft cloth and a mild detergent. However, if the mould has damaged the photograph it may be possible to restore it with a professional restoration service.

The first step in a professional restoration service will be to assess the damage of the photograph. Next, it is important for you to get a high-resolution scan done so that you can use it to repair any damaged areas.

Photographs can be restored by professionals using a variety of methods. Our professionals will use a scanner or studio to capture a digital image of the photograph and then digitally restore any damage to the photograph digitally with photoshop and other similar software programs including Artificial intelligence (mixed up with what we call artistic intelligence). 

The process can take minutes or many hours or days, depending on how extensive restoration is required  but it is often more affordable than traditional photograph restoration and results are incredible when printed in our fine art papers, at the end of the day photo restoration is an art.

Learn more about photo restoration cost in our blog  

stained photo damage in the upper corner and faded colour

Discoloured or Stained photographs

Discolouration and staining can be caused by many different things including accidental spillages, various pollutants and poor storage conditions.

As well as this, various household chemicals such as cleaning products, cigarette smoke and dust can damage the printed image leaving unsightly marks, smears and faded coloring.

The most common causes of discolouration in photographs are poor storage conditions including exposure to sunlight which fade colours or cause bleaching. 

In addition to this poor handling of photos can also cause scratches on them too. These scratches will allow light through causing a white haze over some areas of your photograph that may not have been visible before making it impossible for you to see properly.

To restore faded photographs, we use the latest digital technology to achieve uniform colours and to boost faded areas. Sometimes lost visual information can be recovered by scanning the photograph at a very high resolution or improving the quality of the exposure using photoshop. 

Before attempting any photo manipulation, we urge you to consider seeking expert advice from a professional photo conservator as your first choice.

Faded colour photo damaged by the effect of UV rays and physical interaction

Colour casts and shadows

If you look at a photograph and see that some areas of the image are tinted a certain color, then you are looking at colour cast. A colour cast is caused by the light source used to create the photo (whether natural or artificial). these can be removed by adjusting the white balance in our photo editing software.

It is important to note that all photographs have colour casts – they just aren’t always visible. In other words, if you look at an image and there are no colour.

Torn photo in lower corner

Ripped or torn apart photographs

Whether someone has deliberately tried to destroy a photograph, or it has torn accidentally, this doesn’t necessarily mean the end. 

Rips and tears are one of the most common problems we encounter and often the most satisfying to work on. It’s great to see a torn apart picture come back together again. If you’ve previously used sticky tape to try to fix it, the discoloration this can cause is likely to be rectifiable too.

Unfortunately some parts of an image go missing after a photo is torn. A corner is lost in a house move or, like a sock in the laundry, it simply disappears. We use our artistic skills and historical research to recreate the lost section with amazing results!


Faded colour photo damaged by the effect of UV rays and physical interaction

Creases and wrinkles

The most common cause of creases and wrinkles are from improper storage. If you want to avoid this problem then make sure your photo is stored in a cool dry place with low humidity so as not to cause condensation on top of the paper surface.

You should also frame your photo with two pieces of glass before putting it into the frame, which will protect against any damage caused by moisture.

Our digital artist will be able to recover your photos from any unwanted or accidental creases, let us help!

Spider cracks on an old photo, series of crack damage in a photo that for a spiderweb pattern

Spider-web cracks

The term spiderweb crack refers to the damage caused by a lift of the emulsion off the paper. It usually occurs when there is a violent change in temperature and/or humidity.

While this kind of damage can be repaired by a professional, it is important to recognize that it will not be an easy task. Spider cracks are defined by their shape over the photograph which looks similar to a spider web, with many small lines radiating from one central point on the image. 

The severity of these cracks depends on where they appear—if they affect valuable areas such as faces or other focal points in your photograph then you might want to consider professional assistance

If you’re looking to restore your damaged photos, you must be aware of what type of damage has occurred before attempting any repairs. 

These cracks can be a challenge for photo restoration professionals since they require special care and attention and techniques in order to be properly repaired.

old photo faded, blurry images and colour information lost and hardly recognisable faces

Tape marks and other adhesives used incorrectly

Tape marks are the result of a poor manipulation of a photograph. The main reason for this is that sticky tape is applied directly to the surface of a photo, causing heavy damage on its way out or leaving a discolouration residue when stuck to the photo. 

In some instances it can be physically removed but the photo might be at risk during the process.

In most cases you do not need to remove your own tape from photos as we can digitally restore them for you. Our experts will make sure that your original photograph remains intact and undamaged throughout this process.

When you need to remove tape from your photos, make sure you have a digital copy of the original photograph. Most tape that is applied to photographs will cause some type of damage either on its way out or when stuck to the photo.

old photo faded, blurry images and colour information lost and hardly recognisable faces

Photographs that are stuck together or stuck to Glass

Have you ever discovered a favorite old photograph stuck to the glass of its frame? It’s an upsetting yet common problem for those of us who like to display treasured moments around our home. The sticky part leaves a nasty mark and any attempt to remove it causes rips and tears. good news are It’s possible to restore your picture and have it looking as good as new.

We’re experts at digitally restoring photographs after they get stuck in picture frames — even if the glass is smashed. 

First and foremost, DO NOT try to physically remove the photo from the glass yourself. This will most likely cause further damage. 

However if you want to try to fix this at your own risk, just do not pull them apart; rather soak them in distilled or ionised water (you can buy this at any drugstore). Before trying to remove the glass, be sure you make a copy of the image just incase it needs more work later on digitally.  keep in mind not to leave the photo in water for too long as it might increase the damage. 

Photographs are coated with gelatin which softens when exposed to water which makes separating individual prints easier than if they were dry (like after being stored for too long). 

You can remove the glass by heating up each corner individually with a hair dryer held 4–5 inches away from backside until loosened up enough where one corner can be lifted up then slowly peeled back by hand or better yet use tweezers!

This tips are meant as guideline only but may fail depending on circumstances & age/condition.

So always seek professional assistance before attempting anything yourself!! 

Also keep in mind there’s no guarantee how well these methods might turn out also could end up causing further damage so never put your photos at risk without copying them first.

old photo faded, blurry images and colour information lost and hardly recognisable faces

Peeling photographs

Peeling photographs are a common problem that can occur if your photos are exposed to heat, humidity or moisture or simply time.

 The best way to fix this type of damage is to have them professionally restored by a professional photo restoration expert. If you are unable to do this, there is one last option: try using an adhesive to repair the damage.

We come across plenty of low quality photographic paper made for home printers back in the day that peels, so if you have homemade prints make sure you digitise them properly (we can help!) 


We hope that we were able to give you some insight into the most common damaged photographs. If you ever come across damaged photographs and are unsure of how to handle them, remember that the best thing to do is call in a professional. They will assess the damage and tell you if there is anything they can do before restoring them so they look like new again! So don’t be shy and get in touch we love to help!

Get in touch

Our Postman will always deliver!

Our team is ready to help – no stamps required!

Photo Colourisation

Albert Einstein photo after colourisation

PHOTO COLOURISATION

Digital colouring of Black and white photos 

COLOURISE PHOTOS froM BLACK & WHITE

graphic vintage item

We recreate important moments through colour

Adding colour to a black and white photo does not intend to replace the historical value of the original, at Yesterdays Australia we believe and understand originals are not replaceable and their most significant amount resides with the source, however, our mission is to preserve and connect with memories and history using the technology available to us today. 

Photo colourisation adds a different value to an old grayscale photo, and it helps the viewer to connect with history on a different level, the recreation of colour in a photo acts much more like a compliment rather than a replacement and help us seeing history as we see our lives.

Although some people might differ, We genuinely believe photo colourisation can achieve an emotional connection with a photo, colour is an integral part of our lives and recreating moments, clothing, artifacts and people can undoubtedly describe better moments, stories and memories. 

COLORISE YOUR BLACK & WHITE PHOTOS

graphic vintage item

Check our Before and After Photos

Albert einstein photo before colourisation Albert Einstein photo after colourisation

LIFE HAPPENS IN COLOUR

graphic vintage item

At Yesterdays we can colourise your black and white photos to add life to your family history, our colourisation process involves different techniques and the expertise we have developed over the years.

This photograph restoration process involves:

Digital painting of a black and white photograph
faded photo of cricket players prior restoration Restoration and colourisation of a faded photo with two cricket players

COLOURING BLACK AND WHITE PHOTOS

graphic vintage item

We can achieve a reasonable rate of accuracy when recreating and colourising a photo.

Using Adobe Photoshop and performing proper research of the colour palettes and tonalities, lighting conditions and real textures we can recreate or even modify the colour on a photo.

Photo colourisation requires dedication, passion, lots of time, skills and a good understanding of the period when the photograph was taken,

Adding colour to a black and white photo is not only about adding adjustment layers in Photoshop but choosing carefully which colours to add and howe these behave and blend across the frame.

It is essential to define how light affects the colour and tones, understand the ambient temperature and how soft or harsh was the light at the moment of the capture.

DO YOU WANT TO COLOURISE YOUR photos

graphic vintage item

Submit your black and white photos for a free assessment

Instant photo of a man holding a rolleiflex vintage camera

CONTACT INFO

Phone: +61 8 9213 7107

Mobile: +61 4 9785 9034

Address: 15-17 William St. Perth WA 6000

postman@yesterdays.com.au

Photo Restoration Tips – Scanning

old photo faded, blurry images and colour information lost and hardly recognisable faces

WHAT YOU GET OUT OF SCANNING,
DEPENDS HIGHLY ON YOUR INPUT

graphic vintage item

The first step in digital photo restoration is digitising your photos.

 There are a lot of reasons why you should scan all of your old photographs and transparencies, but the main one is that it’s the only method to restore them in a high quality format that will look great when exhibited or printed. 

You have control over the exposure and appearance of the image when you scan it yourself. You can alter the resolution, crop off unwanted sections (or leave them in), change the colours and brightness, and make any other adjustments that make sense for the particular image.

It is important to understand the difference between resolution and pixel dimensions. Resolution refers to the number of pixels in an image, whereas pixel dimensions refers to the physical size of those pixels. For example, a 300dpi image scanned at 8×10 inches will have more pixels than a 100dpi image scanned at 4×5 inches. The higher the resolution, the more detail can be captured from your old prints or slides.

The higher resolution you are able to scan with when restoring your photo negatives and transparencies, the better results you will get when editing them digitally (in Photoshop or another image editor). however there is a limit on how much information a printed photo, slide or negative can provide.

The digital tools available today allow us to make incredible changes in our images without having much concern about loss of detail due to low resolution scanning. However if you want exceptional quality results then invest in high resolution scans, at Yesterdays Photo we can help!

DO YOU NEED AN EXPENSIVE SCANNER?

graphic vintage item

Scanning a photo is something plenty of people are familiar with these days, and truth is for general photo restoration purposes most of the flatbed scanners you can find commercially can do an acceptable job. 

Indeed technology can make a difference when scanning a photo or a negative, but as long as you use best practices and some common sense, your home scanner can become a powerful tool to convert your photos to a digital format without spending thousands of dollars. 

We have indetified and listed a few tips that will help you getting the most out of this process and the best value out of your home scanner.


HERE IS A COMPILATION OF USEFUL
SCANNING TIPS JUST FOR YOU

1. CLEAN YOUR SCANNER SURFACES

This has plenty of common sense, but you will be surprised how often something this simple is overlooked, 

It is important to understand that when scanning a photo in high resolution, we will magnifying artifacts, fingerprints and particles laying on your scanner glass, therefore maintaining your scanner clean, can make a difference and contribute positively on the final quality of your digital capture and can minimise future dust and scratches on originals.

Preparation is a critical step to achieve a good outcome, so it is always good practice to clean these areas with the manufacturer ‘s recommended tools, chemicals and methods before digitally-capturing any image. (alcohol-based products are not recommended)

The objective of this is to minimise the amount foreign elements to facilitate the photo editing, remember that best results come from a good preparation, common practices are:

  • Remove dust and dirt from your scanner. To do this, use a compressed air duster or soft brush to remove dust from the scanner bed, remember that some particles can be hard and scratch the photo or the glass further.

  • Avoid touching the glass plate of your scanner with fingers, as it may leave oil marks on the glass surface.

Magnifier over fingerprint on scanner glass

2. PREPARE THE ORIGINAL

Ensure that your original is as clean and dust-free as possible before beginning any preparation process of an original. 

Cleaning a photo is risky and can impact negatively, so being meticulous and exceedingly cautious with a family heirloom or historical photograph is not only crucial but logical.

If you want to do it well first process an initial scan this will be kind of you insurance, then use a soft brush or cotton swab dipped in distilled water, but be aware that overusing this method could damage your picture. so Instead of targeting vital areas, test the preparation on a non-vital location such as a corner, and measure the result before continuing

Have in mind Some old photos are likely to be colourised manually and water and friction will remove the pigments or contaminate nearby areas, so the work here is surgical.

We strongly advocate hiring a professional to complete this task; nevertheless, if you insist on doing it yourself, be aware that you do it at your own risk.

hand with gloves holding a swap to prepare photo for scanning

3. HIGH-RESOLUTION IS CRITICAL

The more information we obtain from the original photo the better for the restoration or photo enhancement process;  even if you do not see it directly there is plenty of information in a faded or decouloured photo that can help you, so set up your scanner for the highest-resolution possible regardless if the file size appears to be too large.  

It is important to understand the purpose of the photo and the final destination where is going to be used,  based on this you can decide before engaging works the level of restoration required. 

Print and web drastically differ in resolution requirements, being web specially much more easy to handle, at Yesterdays we can provide you with guidance and professional scanning services with a resolution up to 12800 dpi, large format and negative film scanning.

Resolution comparison of an edited portrait

3. ALWAYS SCAN IN COLOUR

Even when digitalising a photo that its originally in black and white, set your scanner to capture the image in colour, this is particulary useful when editing photos that have been stained or have some colour casting due to the pass of time, UV rays or deterioration of the paper or stock they where printed on.

Photoshop is extremely powerful and can give you control of the different colour channels within a photo, this means that even the slightest colour variations or casts can be manipulated and rectified, by obtaining colour information from the source you will have much more control and fidelity, and can save you or our specialists a ton of time. 


Scan your photos in colour even If they are in grayscale, a can full of coloured pencils suggests this

4. STRAIGHT UP YOUR PHOTOS & POSITION THE ORIGINAL CAREFULLY

The closer you scan your image to a 90-degree angle the better, this will help technically and will ease the restoration workflow for you or our restoration specialists, 

Although straightening images is an easy process in photoshop, there are further benefits by scanning your photos in a 90-degree angle and it is the control of the reflection of light within the texture of the paper or stock the photo has been developed on.  

Make sure the original is flat. If you’re scanning a book, make sure it’s lying flat. If you’re scanning a letter or photograph, hold it up to a light and look for any problems with warped edges.

Don’t let your originals wrinkle or get torn during processing; if possible, avoid running them through an automatic document feeder (ADF) so that there is no risk of physical damage. 


Scan your old photos as straight as possible

5. GOOD INPUT = GOOD OUTPUT

Your scanner, the software you use, and the resolution all have an impact on how well your scanned image turns out. The original is the most crucial component. Don’t expect an image that has been scanned to look nice if it is too dark, fuzzy, missing features, or scratched up. The scanner and software can only do so much to correct for such substandard photographs.

Automatic adjustments may produce aberrations and anomalies that aren’t visible when viewing the original. This specifically occurs when scanning colour images captured with budget or film cameras lacking automated exposure control tools.

For a professional scanning service do not hesitate to contact us, we are alway happy to help!

magnifier focusing on yellow surface

6. SCANNING NEGATIVES AND TRANSPARENCIES

There are some things you can do to enhance the quality of your scans, despite the fact that scanning negatives and transparencies might be more challenging:

As was previously mentioned, planning is essential. Prepare the areas in a dust-free environment by using a sensitive microfiber towel or air duster to gently clean both sides of the scanner glass.

Make sure your slides or negatives don’t have any moisture on them.

Before putting them on the scanner area, wipe off any remaining moisture with a fresh, clean cloth. Some scanners will provide you transparency guides to place these and keep them stable.

Bunch of 35mm photo slides

7. USING A DRUM SCANNER

High-End Drum scanning is an expensive and time-consuming process that we only advise when the value of the photograph is sufficient, (not necessarily commercial value). A drum scanner is an exceptionally high resolution device that has a rotating drum in its interior and functions to obtain detailed and sharp reproduction of transparencies and photographs.

So if you are serious about digitising your photograph or transparencies this is one of the preferred options of many photographers and conservationists around the world.

High end drum scannner

8. PRO-TIP!

A professional tip is to scan your photo 4 times, by rotating the photography to 90, 180, 270, and 360 degreee and scanning it using the same scanner setup, you will achieve an extra set of detail, this is particulary helpful to remove or minimise the textures inherited from the original paper or stock as it reduces considerably the glare caused by the reflection of the scanner light when bouncing on the paper texture.

Once scanned you can use photoshop to align the layers and get the most of the photo using different blending modes to add up or subtract pixels and color information.

Note: be aware that when dealing with some type of textures a different technique of post-processing named FFT (Fast-fourier transform) can help you achieving amazing results in record time.


Old photo with a repetitive texture pattern, usually called honeycomb due to its hexagonal-shaped appearance, comparison with a restored photo where this texture has been suppressed